Renderer
Overview
We developed our own MeshRenderer that supports customizable camera configuration and various image modalities, and renders at a lightening speed. Specifically, you can specify image width, height and vertical field of view in the constructor of class MeshRenderer. Then you can call renderer.render(modes=('rgb', 'normal', 'seg', '3d', 'optical_flow', 'scene_flow')) to retrieve the images. Currently we support six different image modalities: RGB, surface normal, segmentation, 3D point cloud (z-channel can be extracted as depth map), optical flow, and scene flow. We also support two types of LiDAR sensors: 1-beam and 16-beam (like Velodyne VLP-16). Most of the code can be found in igibson/render.
Examples
Simple Example
In this example, we render an iGibson scene with a few lines of code. The code can be found in igibson/examples/renderer/mesh_renderer_simple_example.py .
import logging
import os
import sys

import cv2
import numpy as np

from igibson.render.mesh_renderer.mesh_renderer_cpu import MeshRenderer
from igibson.utils.assets_utils import get_scene_path


def main(selection="user", headless=False, short_exec=False):
    """
    Minimal example of use of the renderer. Loads Rs (non interactive), renders one set of images (RGB, normals,
    3D points (as depth)), shows them.
    """
    print("*" * 80 + "\nDescription:" + main.__doc__ + "*" * 80)

    # If a model is given, we load it, otherwise we load Rs mesh (non interactive)
    if len(sys.argv) > 1:
        model_path = sys.argv[1]
    else:
        model_path = os.path.join(get_scene_path("Rs"), "mesh_z_up.obj")

    renderer = MeshRenderer(width=512, height=512)
    renderer.load_object(model_path)
    renderer.add_instance_group([0])
    camera_pose = np.array([0, 0, 1.2])
    view_direction = np.array([1, 0, 0])
    renderer.set_camera(camera_pose, camera_pose + view_direction, [0, 0, 1])
    renderer.set_fov(90)
    frames = renderer.render(modes=("rgb", "normal", "3d"))

    # Render 3d points as depth map
    depth = np.linalg.norm(frames[2][:, :, :3], axis=2)
    depth /= depth.max()
    frames[2][:, :, :3] = depth[..., None]

    if not headless:
        frames = cv2.cvtColor(np.concatenate(frames, axis=1), cv2.COLOR_RGB2BGR)
        cv2.imshow("image", frames)
        cv2.waitKey(0)


if __name__ == "__main__":
    logging.basicConfig(level=logging.INFO)
    main()
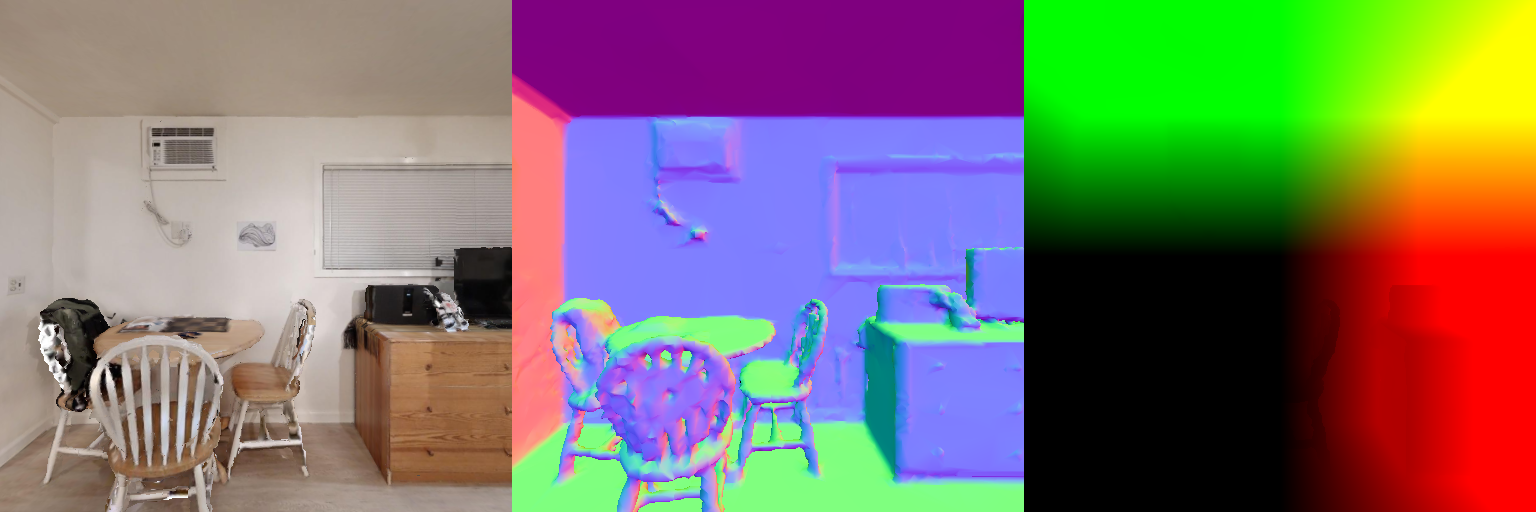
For Rs scene, the rendering results will look like this:

Interactive Example
In this example, we show an interactive demo of MeshRenderer.
python -m igibson.examples.renderer.mesh_renderer_example
You may translate the camera by pressing “WASD” on your keyboard and rotate the camera by dragging your mouse. Press Q to exit the rendering loop. The code can be found in igibson/examples/renderer/mesh_renderer_example.py.
PBR (Physics-Based Rendering) Example
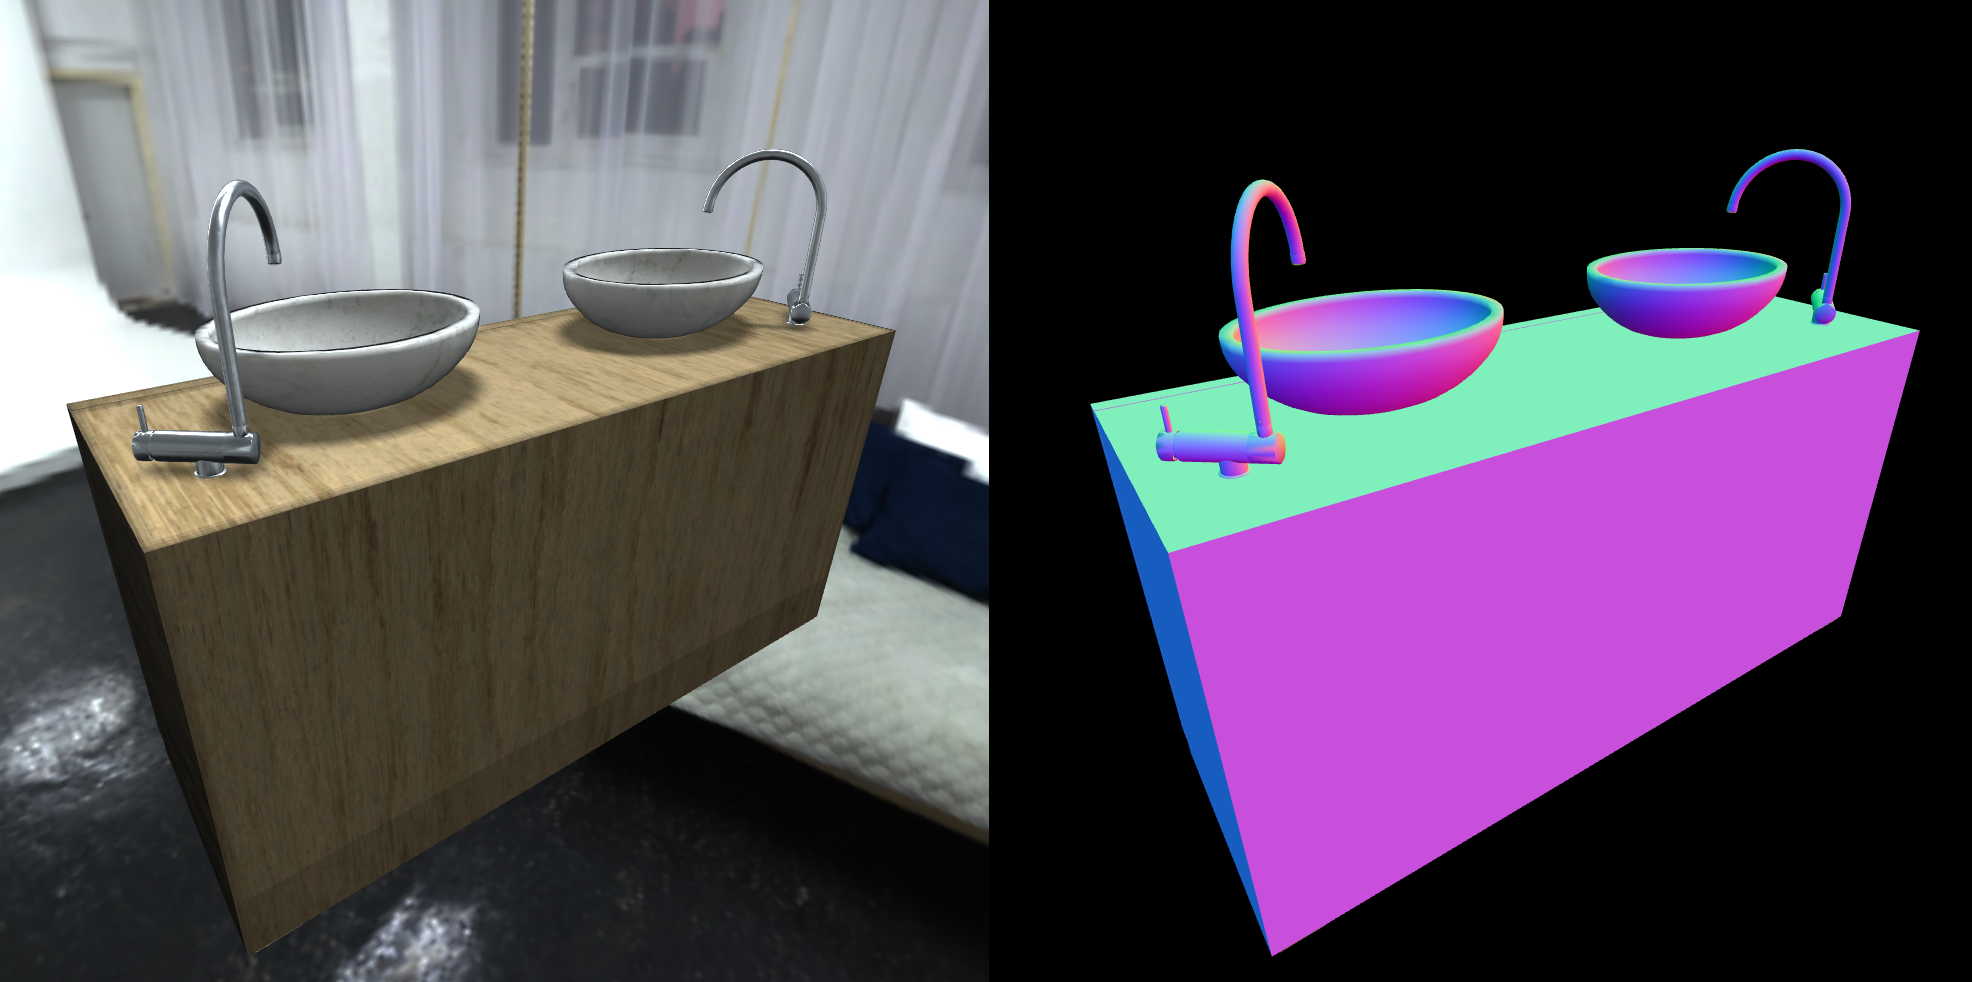
You can test the physically based renderer with the PBR demo. You can render any objects included in iG dataset, here we show a sink for example, as it includes different materials. You need to pass in a folder, since it will load all obj files in the folder.
python -m igibson.examples.renderer.mesh_renderer_example_pbr <path to ig_dataset>/objects/sink/sink_1/shape/visual

You will get a nice rendering of the sink, and should see the metal parts have specular highlgihts, and shadows should be casted.
Velodyne VLP-16 Example
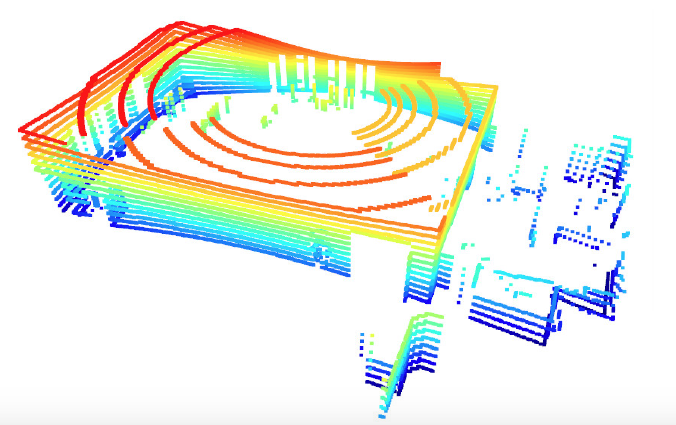
In this example, we show a demo of 16-beam Velodyne VLP-16 LiDAR placed on top of a virtual Turtlebot. The code can be found in igibson/examples/observations/generate_lidar_velodyne.py.
The Velodyne VLP-16 LiDAR visualization will look like this:

Render to PyTorch Tensors
In this example, we show that MeshRenderer can directly render into a PyTorch tensor to maximize efficiency. PyTorch installation is required (otherwise, iGibson does not depend on PyTorch). The code can be found in igibson/examples/renderer/mesh_renderer_gpu_example.py.
About the 3D Image
The mode ‘3d’ provides a 4-channeled image where the first three channels correspond to the x, y, and z coordinates of the pixels in the image. Because our code internally uses OpenGL for rendering, the coordinates are defined in the common convention of this framework: for a given image, the x axis points from left to right, the y axis points from bottom to top, and the z axis points in the opposite direction of the viewing direction of the camera. The camera is located at the location of the link frame “eyes” of the robot, but the orientation is different and defined in the following way: the x axis points along the viewing direction of the camera, the y axis points from right to left and the z axis points from bottom to top. The following code can be helpful to transform points between reference frames:
# Pose of the camera of the simulated robot in world frame
eye_pos, eye_orn = self.robot.links["eyes"].get_position_orientation()
camera_in_wf = quat2rotmat(xyzw2wxyz(eye_orn))
camera_in_wf[:3,3] = eye_pos

# Transforming coordinates of points from opengl frame to camera frame
camera_in_openglf = quat2rotmat(euler2quat(np.pi / 2.0, 0, -np.pi / 2.0))

# Pose of the simulated robot in world frame
robot_pos, robot_orn = self.robot.get_position_orientation()
robot_in_wf = quat2rotmat(xyzw2wxyz(robot_orn))
robot_in_wf[:3, 3] = robot_pos

# Pose of the camera in robot frame
cam_in_robot_frame = np.dot(np.linalg.inv(robot_in_wf), camera_in_wf)

u = 0
v = 0
[td_image] = self.env.simulator.renderer.render(modes=('3d'))
point_in_openglf = td_image[u, v]
point_in_cf = np.dot(camera_in_openglf, point_in_openglf)
point_in_rf = np.dot(cam_in_robot_frame, point_in_cf)
point_in_wf = np.dot(robot_in_wf, point_in_rf)
About the Semantic Segmentation Image
The mode ‘seg’ and ‘ins_seg’ provides a 4-channeled image where the first channel corresponds to the semantic segmentation and instance segmentation, respectively. The values are normalized between 0 and 1, with a normalizing constant of MAX_CLASS_COUNT = 512 and MAX_INSTANCE_COUNT = 1024 (defined in utils/constants.py). The following code is helpful to unnormalize the segmentation image:
[seg, ins_seg] = self.env.simulator.renderer.render(modes=('seg', 'ins_seg'))
seg = (seg[:, :, 0:1] * MAX_CLASS_COUNT).astype(np.int32)
ins_seg = (ins_seg[:, :, 0:1] * MAX_INSTANCE_COUNT).astype(np.int32)
This transformation is directly performed if the segmentation is accessed through a VisionSensor (e.g., as part of the iGibsonEnv) using the method get_seg and get_ins_seg.