Franka Panda Setup
Overview
This page contains instructions for setting up the Franka Panda arm with perls2.
perls2 + Franka Panda Infrastructure
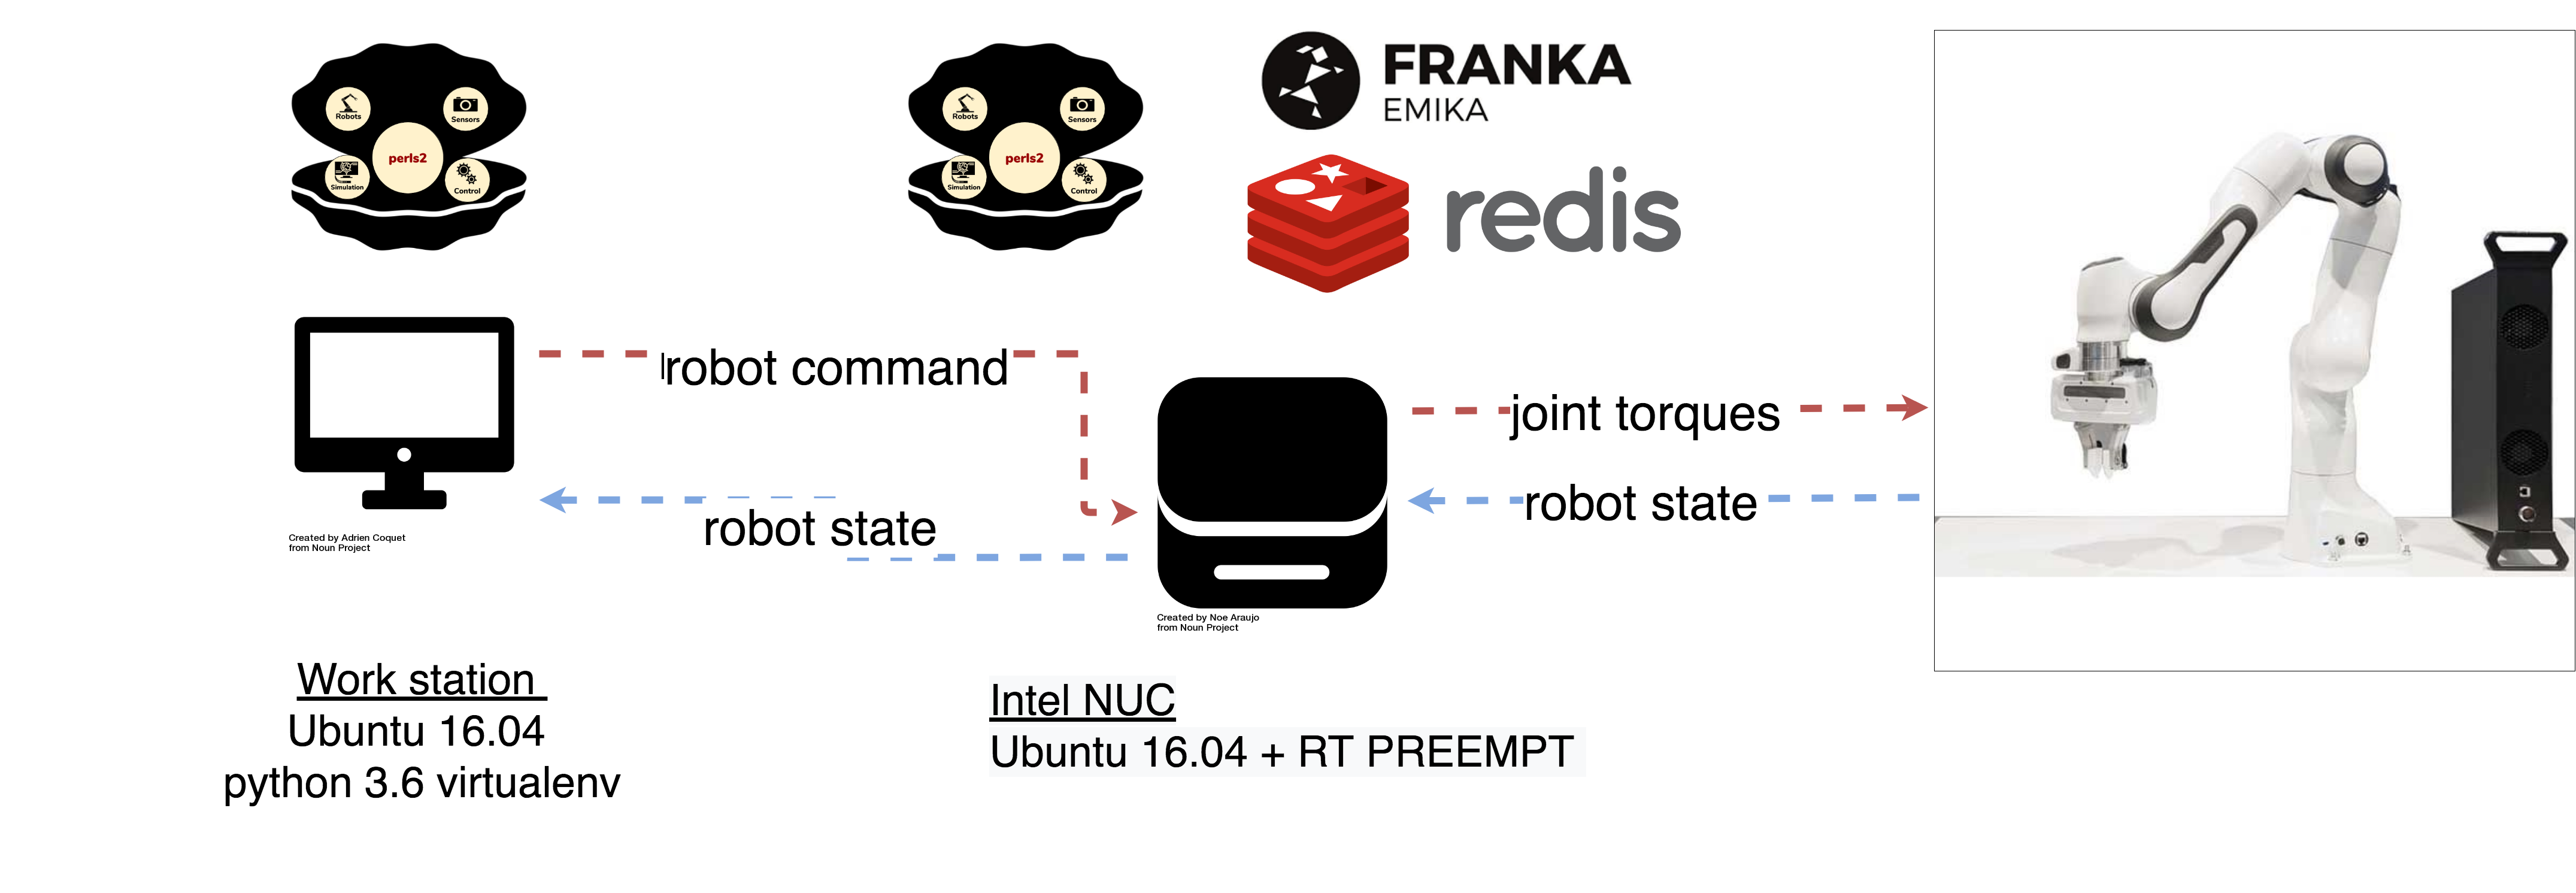
perls2 uses three machines to communicate with the Franka Panda. These machines are connected in a local network. They consist of the:
Franka Master Controller: This is the main control box that comes with the Franka Panda.
Workstation (WS): The workstation hosting the perls2 environment and running any scripts to perform the robot experiment.
Control PC (NUC) or other computer with RT-PREEMPT Kernel: Typically an Intel NUC, is dedicated to running only the processes necessary for torque control.
Using the Franka Panda arm with torque control requires a consistent control loop frequency for sending torque commands to the arm. In order to acheive this, a separate machine with an RT Kernel sends torques to the Master Controller.
The following processes run on the NUC:
redis-server: An in-memory database used by perls2 for interprocess communication. Hosted on the NUC and communicated with via tcp. Allows the
perls2.PandaCtrlInterfaceto bridge theperls2.Envon the WS withlibfranka. See the Redis Help for more on Redis and perls2.franka-panda-iprl driver: A redis wrapper for the
libfrankadriver. Sets redis keys for robot state, and gets torque commands computed by perls2 controllers from redis.perls2 PandaCtrlInterface: Process that implements the robot controller.
Robot commands and controller params are obtained from the WS.
Robot state is obtained from the franka-panda-iprl driver.
The
PandaCtrlInterfaceuses these to calculate the torques required to acheive desired robot state, and sets these to redis for the driver to send to the FCI.
Set up infrastructure
Follow the instructions here to setup the NUC
Follow the instructions here to setup the Workstation.
Run a demo by following the instructions here to use the Franka Panda with perls2. The Gravity Compensation demo is a good place to start.
python demos/run_gc_demo.py --world=Real
You can try other demos with the command line argument –Real as above.